
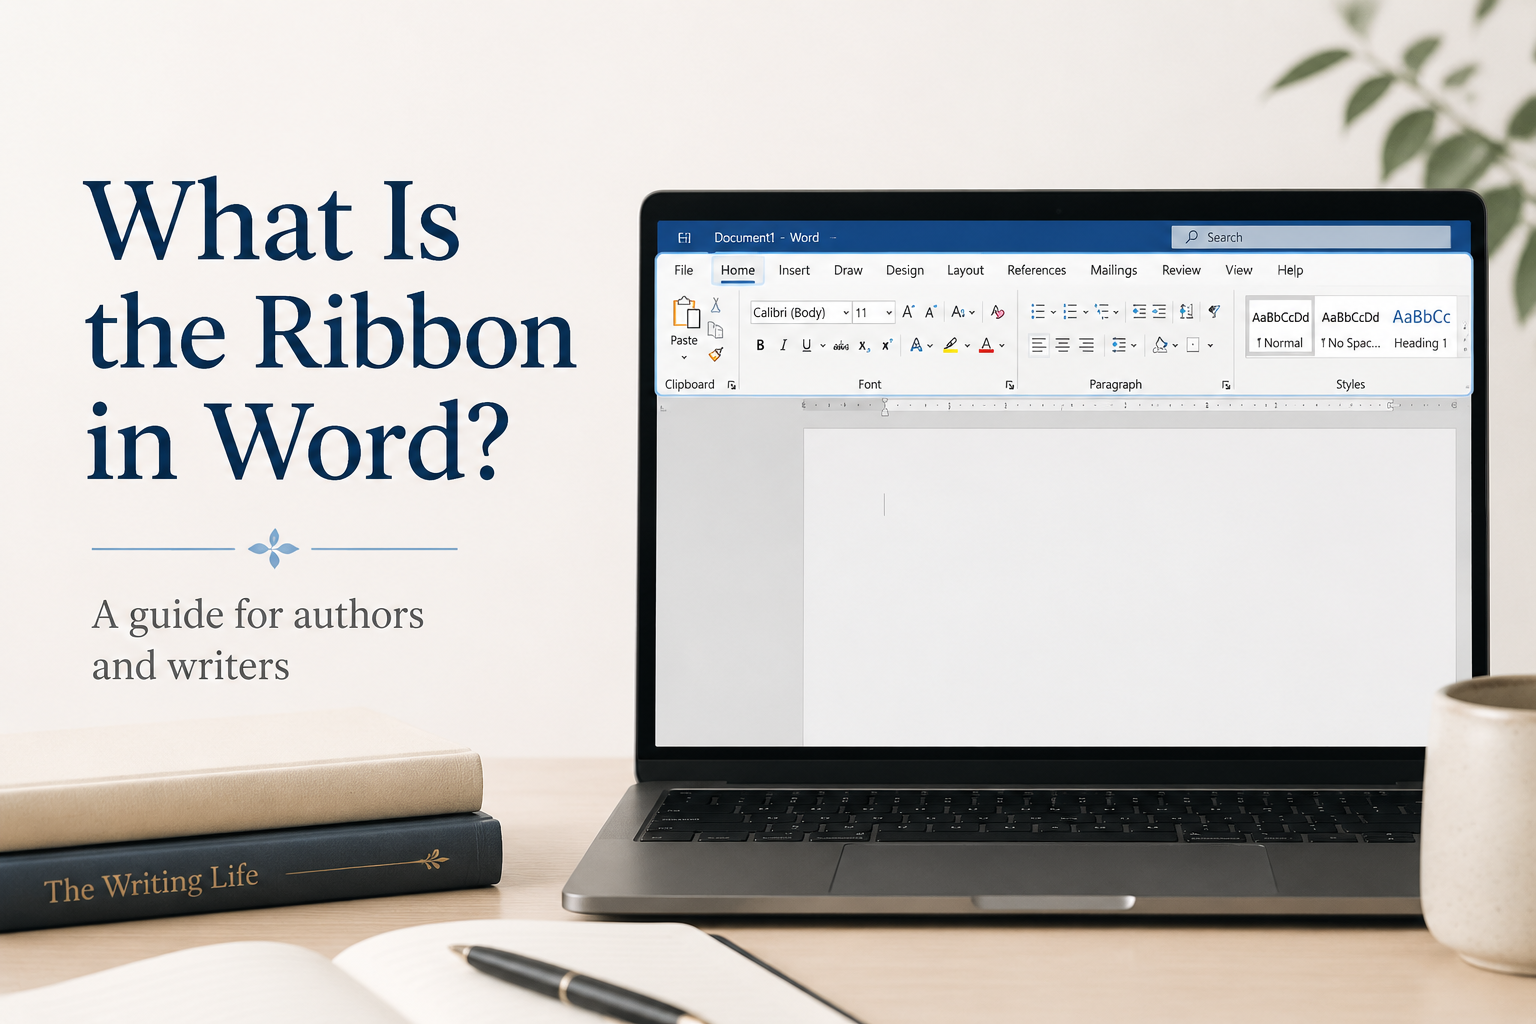
Most of the time you lose in Microsoft Word, you lose in the Ribbon in Word. That strip of tabs and buttons across the top decides how fast you format, how clean your manuscript stays, and how many hours you donate to fiddling with fonts when you should be drafting. But what is the Ribbon in Word?
I think of the Ribbon as your cockpit. If you know where the controls are, and you set it up once, you stop fighting the interface and start using Word the way it was designed to be used, with styles, navigation, review tools, and export options that matter to authors.
What follows is the practical author-focused view: what the Ribbon is, how it is organized, which Word features on it affect publishing outcomes, and the setup I use so a 90,000-word novel or a nonfiction book stays stable from first draft through proof stage.
Table of Contents
What the Ribbon Is and Why Authors Should Care
The Ribbon is the horizontal command bar at the top of Microsoft Word. It replaces the older menu and toolbar system with a set of tabs like Home, Insert, Layout, References, Review, and View. Each tab contains groups of related commands, such as the Font, Paragraph, Styles, or Track Changes. Microsoft documents this interface in their own help page as part of the standard UI for finding commands efficiently, and it is worth reading their overview if you have ever wondered why a feature is buried where it is.
For an author, the Ribbon matters because Word is a formatting engine masquerading as a word processor. Your drafting speed is one issue. Your ability to keep consistent headings, clean paragraph spacing, and sane page breaks is another, and those problems live on the Ribbon. When you do not know where a command is, you reach for manual fixes. Manual fixes feel fast in the moment, and they create a mess later, especially when you are preparing a manuscript for an editor, an agent, Amazon KDP upload, or a print interior.
Tabs, Groups, and Commands
Word organizes the Ribbon in three layers. Tabs are the big categories across the top. Groups are the labeled clusters of tools within a tab. Commands are the actual buttons, menus, and toggles. You will see this structure immediately on the Home tab, where Clipboard, Font, Paragraph, Styles, and Editing all sit in their own groups.
If you want to get faster in a way that actually holds up across an entire book, train your eyes to look for the group first. When you know you are working with paragraph behavior, you look in Paragraph. When you know you are working with consistent formatting, you look in Styles. This habit sounds small, but it breaks the cycle of hunting.
Contextual Tabs That Appear Only When You Need Them
One reason Word seems unpredictable is that contextual tabs appear when you click certain objects. Click a table to access table design and layout tools. Click an image to access the picture formatting tools. You can also click a chart to open the chart tools.
Authors run into this when adding maps, family trees, or a simple graphic for a nonfiction chapter. The Ribbon keeps those features tucked away until you select the object first. If you cannot find the command, click the thing you want to change and watch what tabs pop up.
The Quick Access Toolbar as Your Author Shortcut Strip
Above or below the Ribbon sits the Quick Access Toolbar. This is a small set of always-visible buttons you choose, and it is the closest thing Word has to a custom author dashboard. I like it because it stays consistent even when contextual tabs appear, and your brain is already busy with story problems.
For most authors, adding three commands pays off immediately: Save, Undo, and Redo are already there, but I also add Styles Pane, Navigation Pane, and Show or Hide formatting marks. Those three solve common manuscript headaches before they spread.

How the Ribbon Is Organized in Word
The Ribbon is organized around tasks that Microsoft assumes users perform: writing and formatting on Home, adding objects on Insert, controlling page geometry on Layout, managing citations on References, collaborating on Review, and managing what you see on View. That organization is not perfect for book writers, since a book blends several tasks at once. Your goal is to understand the intended layout so you can stop thinking about it.
Word also changes what you see based on screen size. On a narrow laptop display, groups collapse into a single icon you have to click. On a wide monitor, you see the full set of buttons. This is a design choice, and Microsoft explains the behavior in their documentation on how the Ribbon adapts to your window size, which matters if you switch between a desktop and a travel laptop.
Home Tab as Your Drafting Workbench
The Home tab is where authors spend most of their time, and it is also where much manuscript damage occurs. Font and Paragraph tempt you into local formatting. Styles gives you global control. Editing includes Find and Replace, which is one of the few tools that scales to book length.
If you are formatting by hand, you are building a brittle document that breaks the moment you paste in a revised chapter, accept tracked changes, or reflow pages for print trim size.
Layout Tab as Your Print Reality Check
Layout controls margins, indents, spacing, page breaks, and section breaks. Authors often visit it only at the end. I prefer to treat it as a reality check early, especially for nonfiction with charts, tables, or callouts. If you ever create a print edition, Layout is where your manuscript begins behaving like pages.
Section breaks are the tool that prevents Word from behaving like a haunted house. Different headers for front matter, page numbers starting at Chapter 1, landscape pages for a map, and different margin settings all depend on how you divide the file into separate parts.
References and Review Tabs for Professional Draft Handling
Nonfiction authors live in References. Fiction authors usually ignore it, except for a table of contents in some special cases. Review matters to everyone because it handles Track Changes, comments, compare documents, and language tools. Those are the features that make working with editors and proofreaders tolerable.
The Ribbon Features That Matter for Manuscript Drafting
If you want Word to behave for long-form writing, your success comes down to a few Ribbon features. Authors often think they need better discipline or a different app. In my experience, they need to stop treating formatting like decoration and start treating it like structure.
Styles as Your Book’s Skeleton
Styles consistently control the look and behavior of text. If you set Heading 1 for chapter titles and Normal for body text, you can change the entire manuscript’s appearance with a few style edits. You also unlock automatic navigation, consistent spacing, and clean export paths.
When you format chapter titles by enlarging the font, centering it, and adding extra blank lines, you create local overrides. Those overrides accumulate, and then your chapter starts on the wrong page, your table of contents breaks, and your editor sends you a version where everything looks different.
My recommendation is simple: open the Styles Pane from the Home tab and commit to using styles for anything you repeat. Chapter titles, subheads, block quotes, scene breaks, and captions all qualify. Once you do, you can create a table of contents for nonfiction or for a collected edition without rebuilding the entire document.
Navigation Pane for Structural Editing
Authors revise in chunks. You move scenes, reorder chapters, and test a new sequence. The Navigation Pane, found under the View tab, uses headings to show a clickable outline. If your headings use real heading styles, you can drag chapters around like index cards.
This is how I handle a big developmental revision when the outline changes. I do not scroll or hunt. Instead, I jump directly to the section and move it. If your book has 60 chapters, this is the difference between controlled revision and accidental chaos.
Find and Replace for Repeated Problems
Find and Replace on the Home tab is where you fix systematic issues fast: two spaces after a period, extra blank paragraphs, a character name spelled wrong, curly quotes sitting next to straight ones, or a recurring formatting mistake that came in through copy-paste.
Use the advanced Find options and search for formatting, not only words. You can find all italicized text, all double spaces, or all manual line breaks. For long manuscripts, this scales better than manual cleanup.
The Ribbon Features That Matter for Editing and Collaboration
Word earns its place in publishing because editors and proofreaders rely on it. The Ribbon tools in Review let you collaborate while preserving accountability. You can see what changed, who changed it, and what decisions you still have to make.
Track Changes and Comments for Real Editorial Work
Track Changes is on the Review tab. When it is on, Word records insertions, deletions, formatting changes, and moves, depending on your settings. Comments let your editor ask questions and flag issues without rewriting your voice.
If you plan to send a manuscript to a freelance editor, learn these settings before you hit send. I have seen authors accept all changes without reading a single one, and I have seen authors reject everything out of fear. Both moves create extra work and weaker books.
Turn on Track Changes. Set your display to show markup in a way you can handle. Then process edits in passes.
- First pass for big meaning changes.
- Second pass for style and clarity.
- Third pass for clean formatting.
You do not want to argue with a comma while your plot logic is still wrong.
Compare Documents When Versions Multiply
Every author eventually ends up with Draft_Final, Draft_Final2, Draft_Final_ReallyFinal, and whatever the editor sent back, which looks similar but not identical. Compare, also on Review, is how you find out what changed without doing detective work.
When you receive a revised file, save your current version, then use Compare to generate a new document with marked differences. You get a clean record of changes, and you avoid overwriting something important.
Spelling, Grammar, and Readability Tools
Word’s Editor tools can catch obvious issues, and they have improved over the years, but they still do not understand your genre voice. For example, a thriller’s short sentences can look wrong to a general grammar checker. On the other hand, a fantasy novel’s proper nouns can trigger false flags for pages.
I treat Word’s suggestions like a junior copyeditor. It catches typos I miss and recommends changes that would flatten voice. Accept what improves clarity, then ignore what dilutes tone. For anything serious, you still need a human pass, even if that human is you reading aloud.
Customizing the Ribbon for Writing and Publishing Work
Most authors never customize the Ribbon, and they pay for that choice every day. Word lets you add tabs, create groups, and pin your most-used commands. A small setup session saves hours across a book project, especially if you write multiple titles a year.
My Baseline Author Ribbon Setup
I keep the default tabs, but I add a custom tab called Manuscript. Inside it, I place the commands I use constantly: Styles Pane, Navigation Pane, Show or Hide, Format Painter, Paragraph dialog launcher, Page Break, Section Breaks, and Clear All Formatting. Clear All Formatting is the fire extinguisher when pasted text arrives with odd fonts and spacing.
You can do this in Word Options, under Customize Ribbon. Add a new tab, add a new group, then choose commands from the full list. If you use multiple machines, export your Ribbon customizations and import them elsewhere to make the setup consistent.
Keyboard Shortcuts as the Real Speed Tool
The Ribbon is visible, but shortcuts are faster. Many Word commands have default shortcuts, and you can add your own through customization options. For drafting, I rely on shortcuts to apply styles, search, and insert breaks.
My advice is to pick three high-frequency actions and learn the shortcuts until they are automatic. For most authors, that is applying Heading styles, opening the Navigation Pane, and finding the next instance of a word or formatting issue.
How This Fits With Author Tool Stacks
Some authors draft in Scrivener or Google Docs, then move to Word for edits and production. Others live in Word from day one. Either way, the Ribbon is where your manuscript becomes a professional document that a publisher, formatter, or proofreader can work with.
At Adazing, I build tools for authors who want fewer friction points across the whole publishing workflow. You might use a drafting tool like QuickWrite for focused writing sessions, then bring the manuscript into Word for collaborative edits, style cleanup, and final document prep. When you understand the Ribbon, that handoff stops being painful.
FAQs for What is the Ribbon in Word?
Why did my Ribbon disappear in Word?
Your Ribbon is probably minimized. Look for Ribbon Display Options near the top-right of the Word window and choose an option that shows tabs and commands. You can also toggle it with Ctrl+F1 on Windows in many Word versions, or use the View settings depending on your build.
Can I add my own buttons to the Ribbon for writing?
Yes. Go to Word Options, then Customize Ribbon, and create a new tab or group. Add commands like Styles Pane, Navigation Pane, Section Breaks, and Clear All Formatting. If you do this once and export the settings, you can import them on another computer and keep the same workflow.
Which Ribbon tab matters most for authors?
Home matters most day-to-day because it holds Styles, Paragraph controls, and Find and Replace. Review matters when you work with an editor or proofreader, since Track Changes and comments are the backbone of professional collaboration. View matters when you revise structure, because the Navigation Pane changes how you move through a long manuscript.
Using the Ribbon Without Letting Word Run Your Book
The Ribbon is not trivia. It is the map to the few Word features that keep a book-length document stable: styles, navigation, breaks, and review tools. If you take one hour to learn where those live and another hour to customize your workspace, Word stops feeling like a pile of hidden switches and starts acting like a production tool.
If your current manuscript is already messy, start small. Turn on Show or Hide, apply real styles to your chapter headings, and use the Navigation Pane to move through the draft. Once those habits are in place, the Ribbon turns from clutter into control.
